How to Install OpenClaw: A Complete Setup Guide
 Ekene Eze
If you’re trying to install OpenClaw and get your AI agent running without things breaking halfway, you’re in the right place. From starting the gateway to connecting your AI model provider and messaging app, the full setup is covered step by step. You’ll go from scratch to a working agent without guessing what comes next.
For a first-timer, OpenClaw’s setup can feel like a lot, because it requires access to your machine, including your file system, shell, and external services like Google Calendar and email. Missing a step can leave your agent unresponsive or improperly configured, which is why getting the setup right matters. With a clean and secure setup, your phone becomes the control center, and your personalized AI agent runs tasks safely in the background on your behalf nonstop.
This guide walks you through the complete OpenClaw installation process. By the end, you’ll have a fully working setup with your AI assistant running in the background and sending responses live in chat.
TL;DR
Follow these steps to go from a fresh install to a fully working OpenClaw agent:
Decide where OpenClaw will run based on your needs and setup.
Install OpenClaw and confirm the CLI is working correctly.
Connect your AI provider so your agent can generate responses.
Start the gateway to keep your agent running in the background.
Send messages to your agent via the Control UI.
Create a Telegram bot and connect it to OpenClaw, so you can send and receive messages from your phone.
Add a skill to enable real-world actions like web search.
Choosing your setup
Before you install OpenClaw, you have to decide where it will live. You can either install it on your personal laptop, a dedicated device, or host it on a Virtual Private Server (VPS). Let us compare these three options to help you decide:
Personal laptop | Dedicated device | VPS / cloud | |
|---|---|---|---|
Cost | Free | One-time hardware | ~$5–20/month |
Privacy | Medium | High | Medium |
Always-on | No | Yes | Yes |
Setup effort | Low | Medium | Low–medium |
Performance | Shared | Dedicated | Scalable |
Best for | Testing & exploration | Private permanent agent | Teams, remote access |
Limitation | Not always-on; shell access risk | Upfront cost | Monthly cost; privacy |
For a first install, your personal machine is fine. Once you’re ready for a permanent setup, a dedicated device offers the best balance of privacy and reliability. A VPS is the fastest path to an always-on agent without buying hardware.
Steps 1–5 in this guide apply to every setup type. Jump to the dedicated device or VPS section after completing Step 2 if you choose one of those tracks.
Prerequisites
After deciding where you want to set up OpenClaw, ensure you have the following:
Node.js 24 (recommended) or Node 22.14+. The installer script handles this automatically. If you’re not sure of the version, run
node -v.An API key from at least one AI provider: Anthropic, OpenAI, or Google.
A package manager: npm, pnpm, or bun.
A terminal: macOS terminal, iTerm2, or any Linux shell. If you are a Windows user, use WSL2, as it is more stable than native Windows for OpenClaw.
A messaging account, Telegram is the preferred choice (optional but recommended).
If you’re using a Mac mini as your dedicated machine, perform a clean macOS install, disable unnecessary background services (Location, Siri, Apple Intelligence), and set Energy settings to prevent sleep.
Setting up WSL2 on Windows
If you’re using Windows and don’t have Windows Subsystem for Linux (WSL) installed, complete this setup before proceeding:
Click Start and type
wsl.Open the terminal, then press Enter (or any key) to begin installation.
Restart your machine after installation.
Enter this command to install Ubuntu:
With everything in place, you can now proceed with installing OpenClaw.
Step 1: Install OpenClaw
There are three ways to install OpenClaw on your machine.
1. Use the one-liner installer (recommended)
This is the fastest way to get OpenClaw up and running. The installer script detects your operating system, installs Node if needed, sets up OpenClaw, and launches the onboarding wizard automatically.
Paste this in your macOS, Linux, and WSL terminals:
If installation is successful, you should see an output like this:
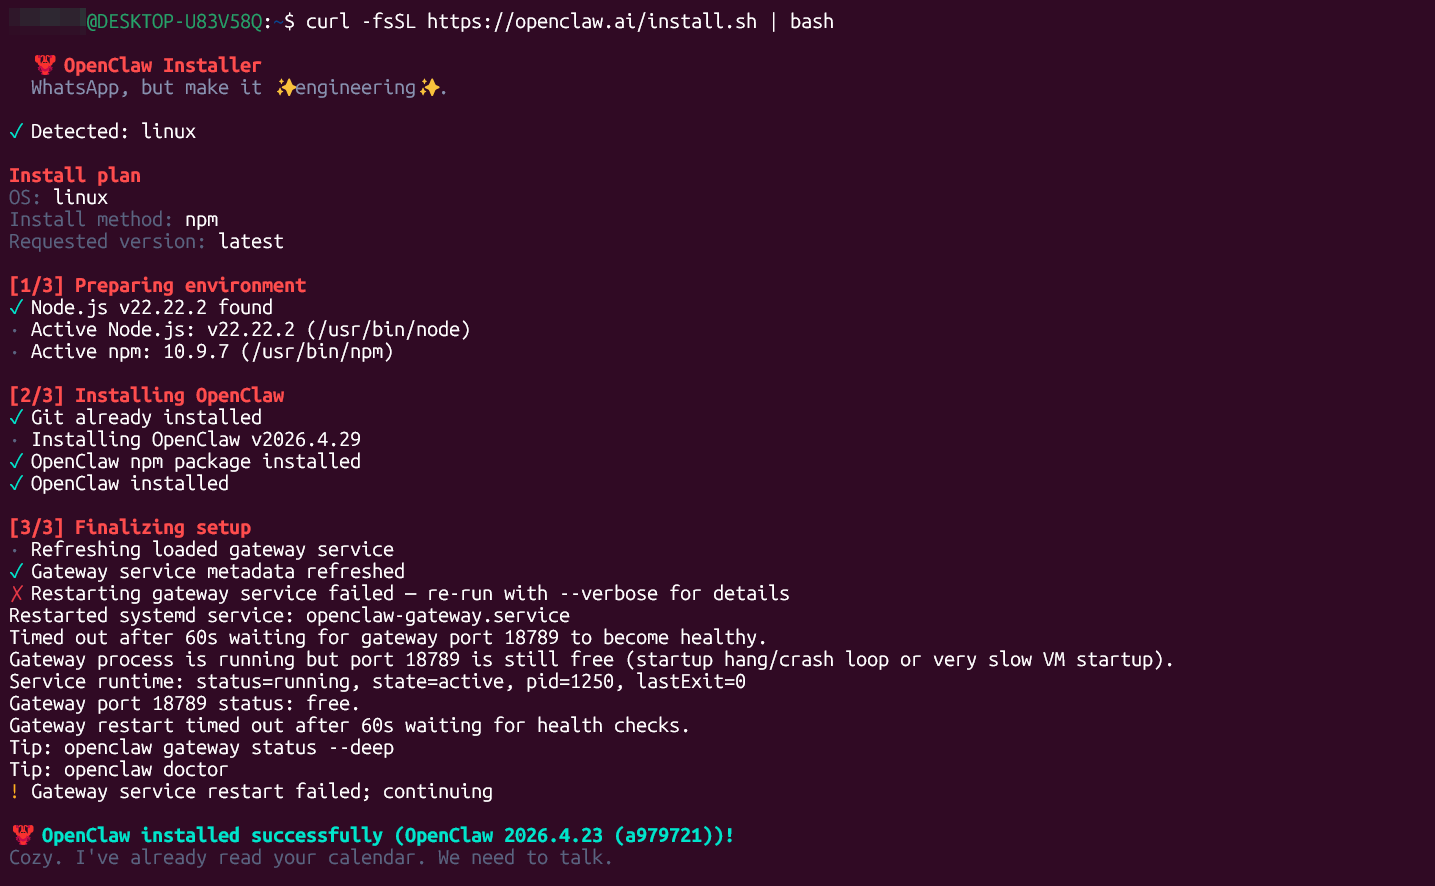
On macOS/Linux, if you run into a permission error, use the npm install method below instead.
2. Install via npm
If you manage Node and prefer a manual install, run:
If the install fails due to a globally installed libvips, run:
3. Install from GitHub
To work with the latest version of OpenClaw, install from its GitHub main branch:
Verify the install
Before moving on, confirm the CLI is available by running the openclaw --version command. You should get an output like this:
After confirming the CLI's availability, run the openclaw doctor command to check for configuration issues. I also run this command anytime I want to check for any post-installation changes or when I want to ensure everything I've added to extend OpenClaw, such as skills and plugins, is functional.
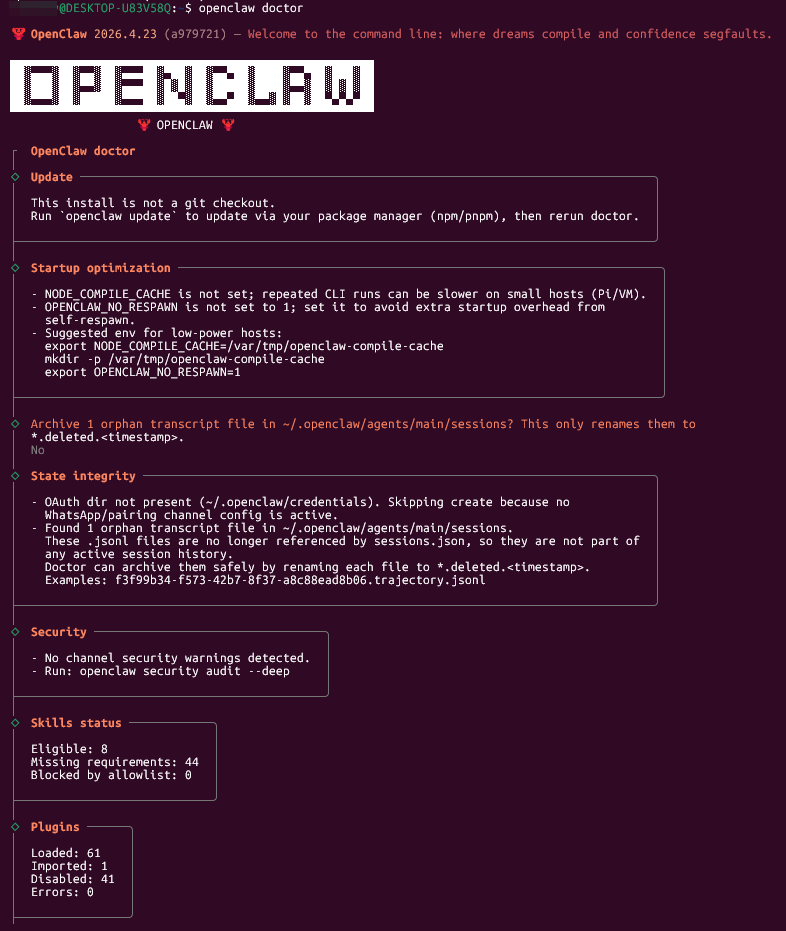
If OpenClaw isn’t found after a successful install, run:
Add that line to your ~/.zshrc or ~/.bashrc and open a new terminal.
Step 2: Run onboarding
Launch the onboarding wizard
OpenClaw’s onboarding wizard walks you through choosing a model provider, setting the API key, and configuring the local gateway. Launch your onboarding wizard with this command:
The --install-daemon flag installs the background service, so the gateway starts automatically on login.
Choose your model provider
The wizard will prompt you to select a default AI model for your OpenClaw to run. There are several providers you can choose from, but here are the three common options:
Claude: Recommended for most users because it handles long-running agent tasks, tool usage, and code-related workflows reliably.
OpenAI: A strong choice if you want faster responses and prefer GPT-style reasoning for coding and general assistant tasks.
Gemini: Useful if you already use Google services and want tighter integration with the Google ecosystem.
After selecting your preferred AI provider, paste your API key when prompted. If the provider requires payment, make sure your account has available credits. Note that you can switch or add providers later from the control UI, so this is not a permanent decision.
Set up the gateway daemon
The OpenClaw gateway daemon is the central control and persistent background service that keeps OpenClaw running even when your terminal is closed. This is what makes OpenClaw “always-on.” It acts as a bridge between your messaging apps and the AI model.
Without the daemon, you’d need to manually start the gateway every session, which is not ideal, especially on a dedicated machine. On macOS, it’s a LaunchAgent, while on Linux and WSL2, it’s a systemd user service.
To check gateway status, run:
You should see details about your OpenClaw gateway, including runtime status, connectivity probe, port reference, dashboard URL, etc.
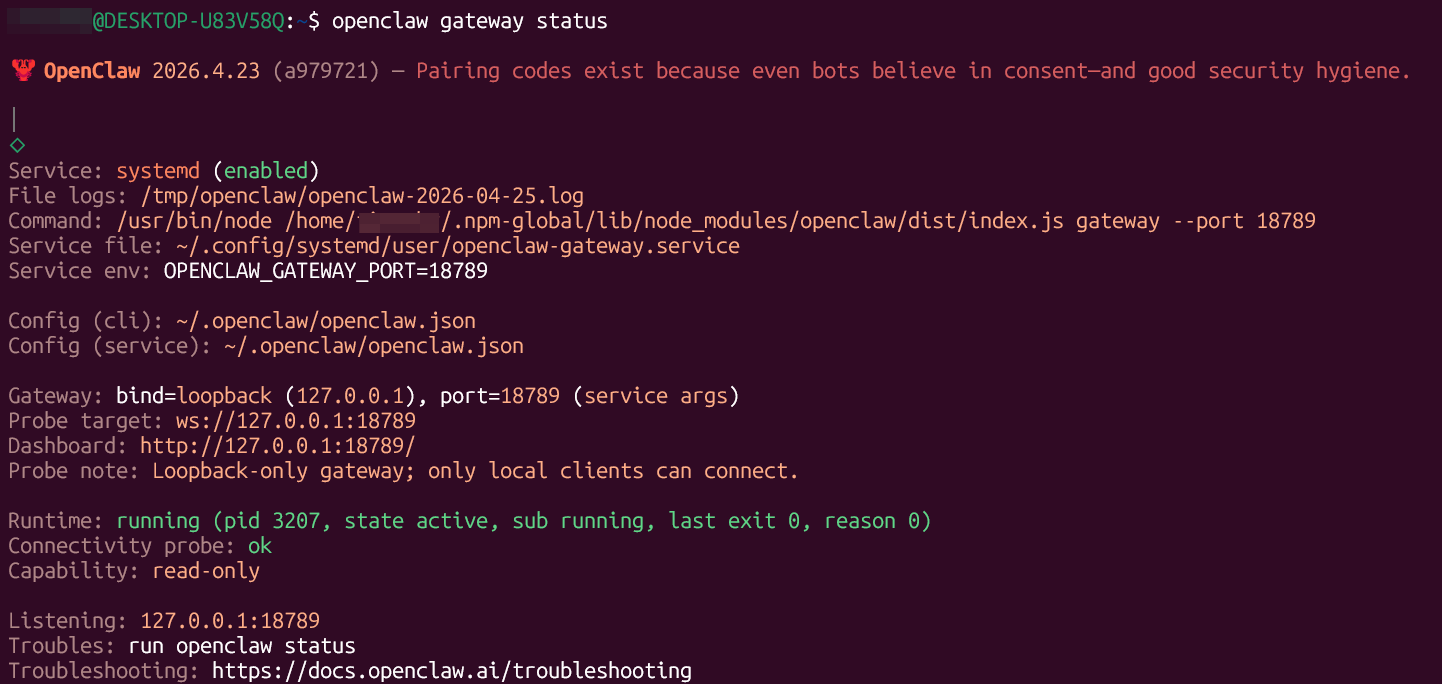
If the gateway is not running, start it manually:
Step 3: Send your first message on the OpenClaw dashboard
Up until this point, you’ve been working in the terminal, and can’t see information about your agent and its activities at a glance. That’s where the OpenClaw dashboard or control UI comes in. It is a real-time web interface with a graphical management panel that allows you to monitor your agents and manage their workflows.
Open the Control UI
In your terminal, run openclaw dashboard to display the dashboard URL. By default, the dashboard is at http://localhost:18789/ . To access your specific OpenClaw agent, click on the generated URL with your gateway auth token appended.
Something like this:
On the dashboard, you can see your chat with the agent, an overview, OpenClaw channels, instances, sessions, API usage and cost, cron jobs etc.
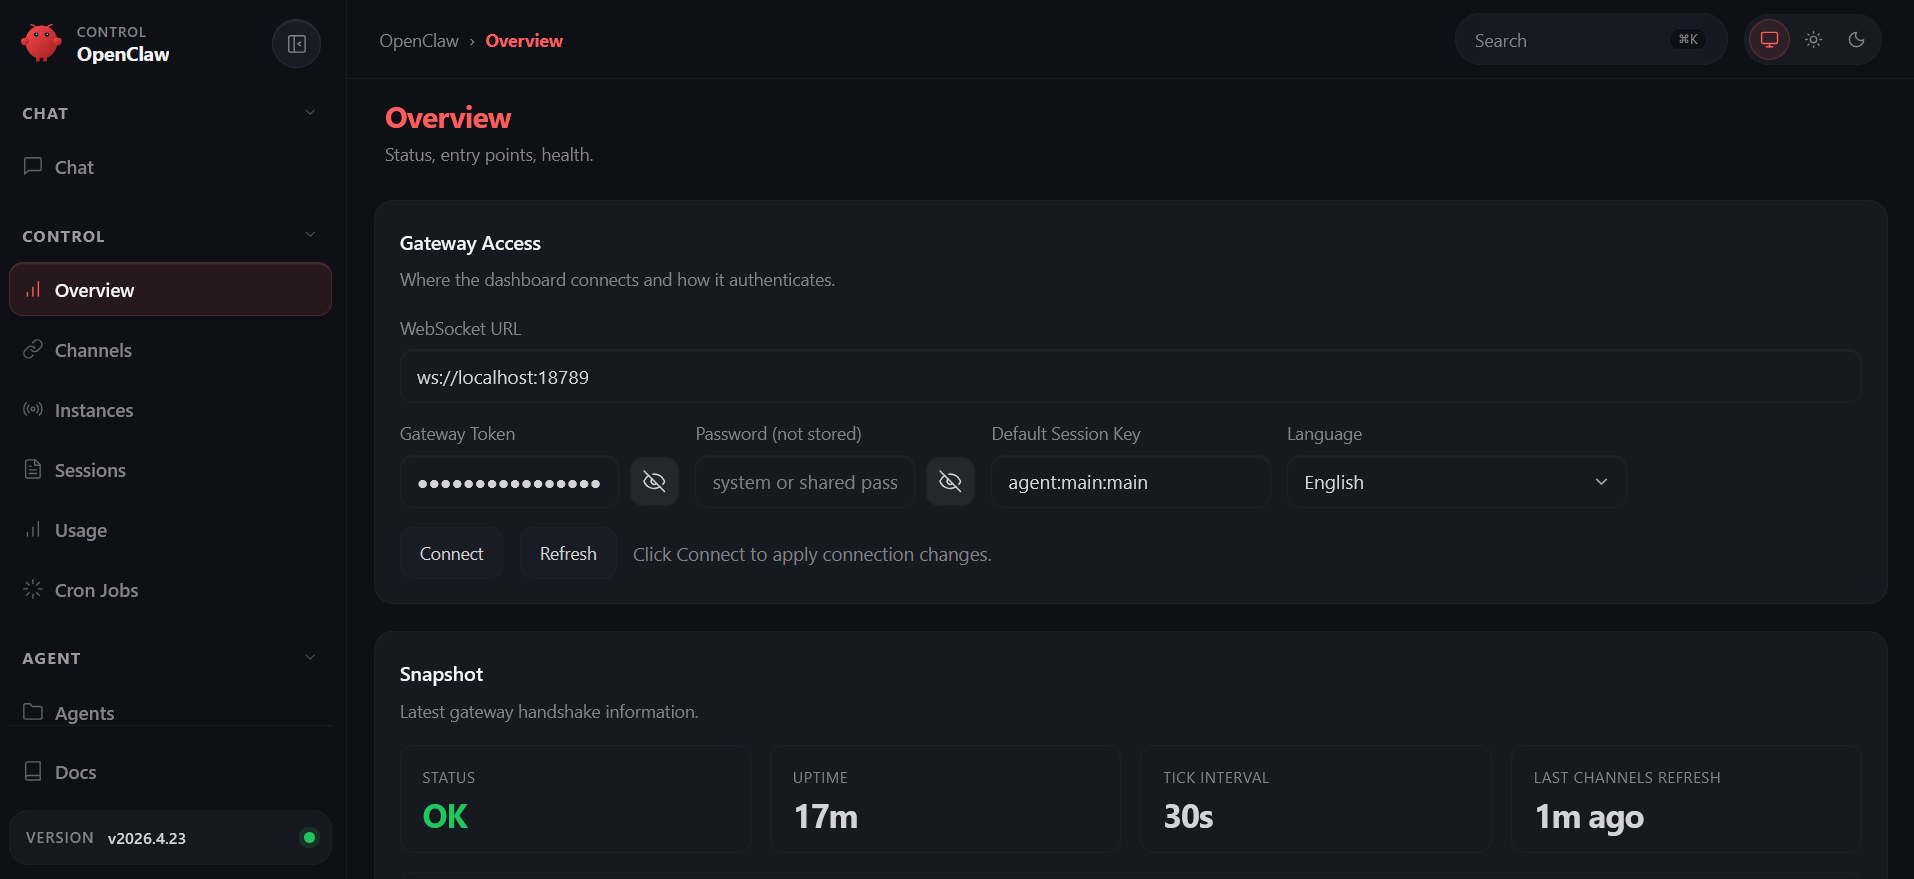
Ensure your agent's status is always OK. Otherwise, check and identify the problem.
Send your first message
In the Chat section on your dashboard, you can start a conversation with your agent. To test whether your agent is well set up, send this message: “Tell me what you are and what model you’re running on.” A healthy response will reply with the name you gave your agent and the default model you configured during onboarding.
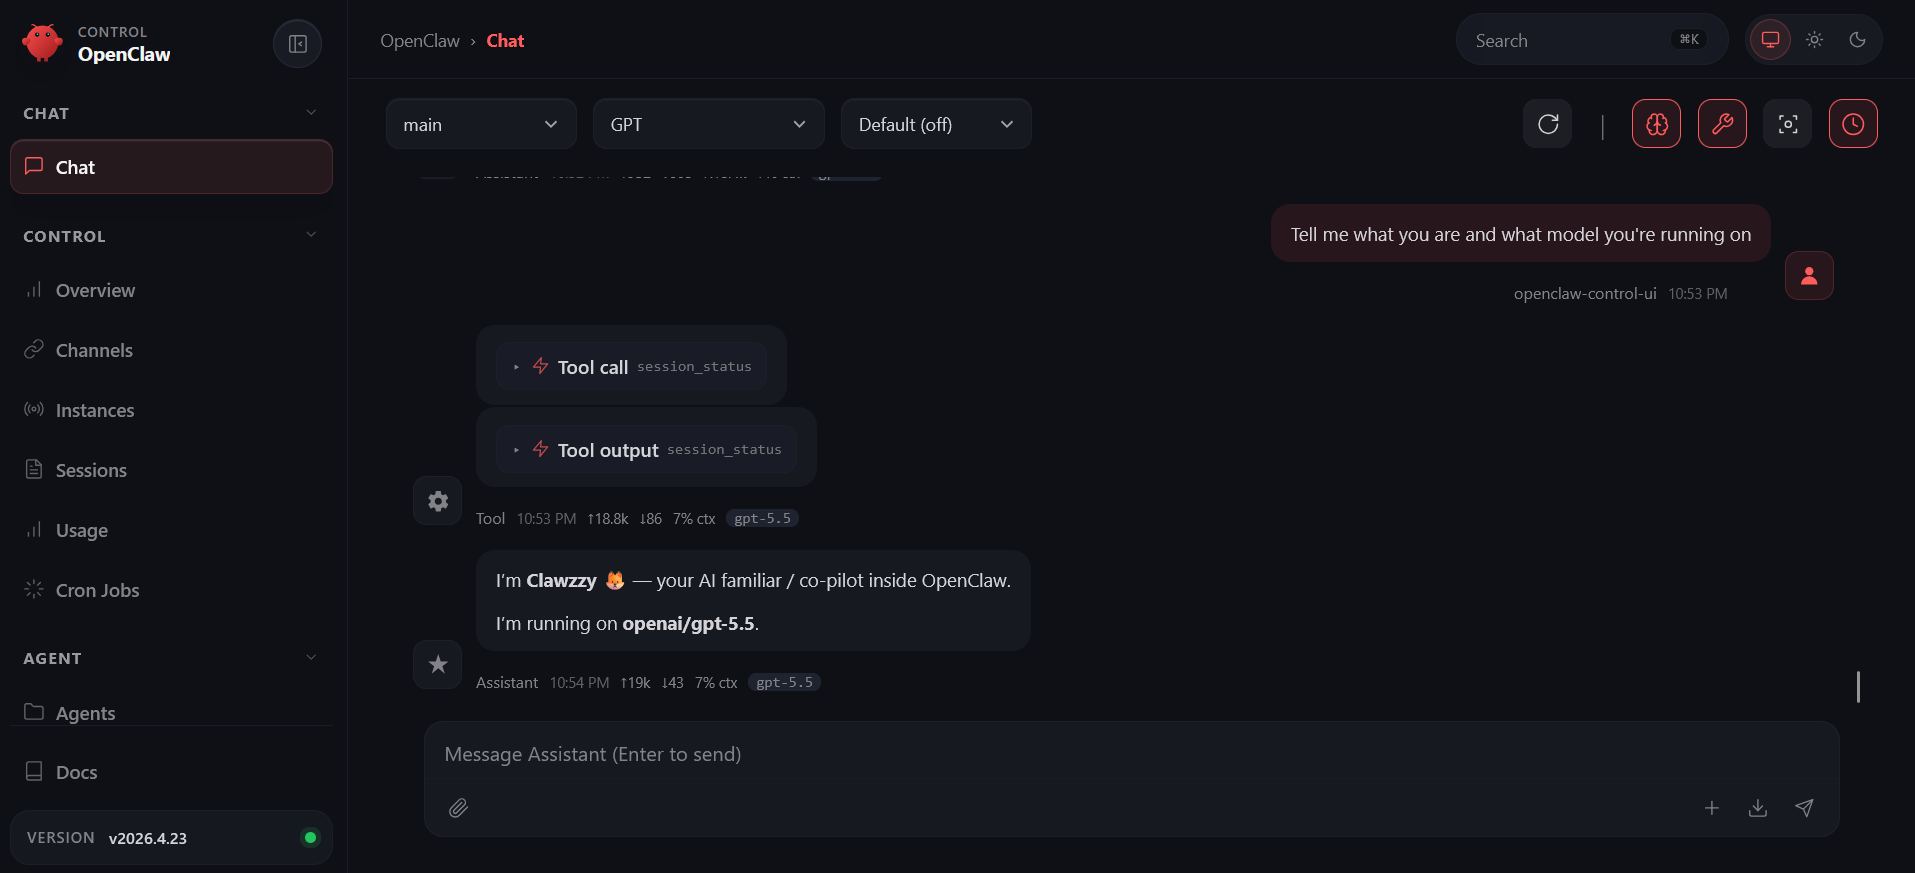
If you get a reply, it means your setup is working end-to-end, your CLI is installed correctly, and the gateway and AI provider are connected.
Step 4: Connect a messaging channel (Telegram)
To communicate with your OpenClaw agent conveniently, you need to connect it to a messaging channel. OpenClaw supports Discord, WhatsApp, Slack, iMessage, and Signal. For this guide, you’ll be working with Telegram, because it’s the fastest channel to set up and the most commonly used for mobile access.
Create a Telegram bot token
Search for @BotFather (look for the verified checkmark).
Open the BotFather chat and click on Start to begin the conversation.
Create a new bot by entering
/newbot.Choose a name for your bot.
Choose a username for your bot. The username must end with ‘bot’.
BotFather replies with your bot token. Copy and keep this secret key somewhere safe. The token usually comes in this format:
1234567890:AAHpJmMf0-Q-FaIU4lROmkIfywPneTIe3to.
Add the bot token to OpenClaw
Open the terminal, and enter
openclaw channels add.Choose "Yes" when prompted to configure chat channels.
Select "Telegram (BOT API)" as the channel.
Choose it as "Default (primary)" channel.
Enter the Telegram bot token.
Select Finish.
Select "No" when prompted to configure DM access policies.
Go to Telegram, navigate to the last message sent by BotFather, and click on your new Telegram bot link.
Click on Start to trigger OpenClaw to send a pairing code.
Copy the pairing code sent.
Go back to the terminal, and run:
plaintext
Send a test message from your phone
You have successfully paired your Telegram bot with your OpenClaw agent. You can now go to Telegram and send a message to your bot. You should receive a reply in seconds.
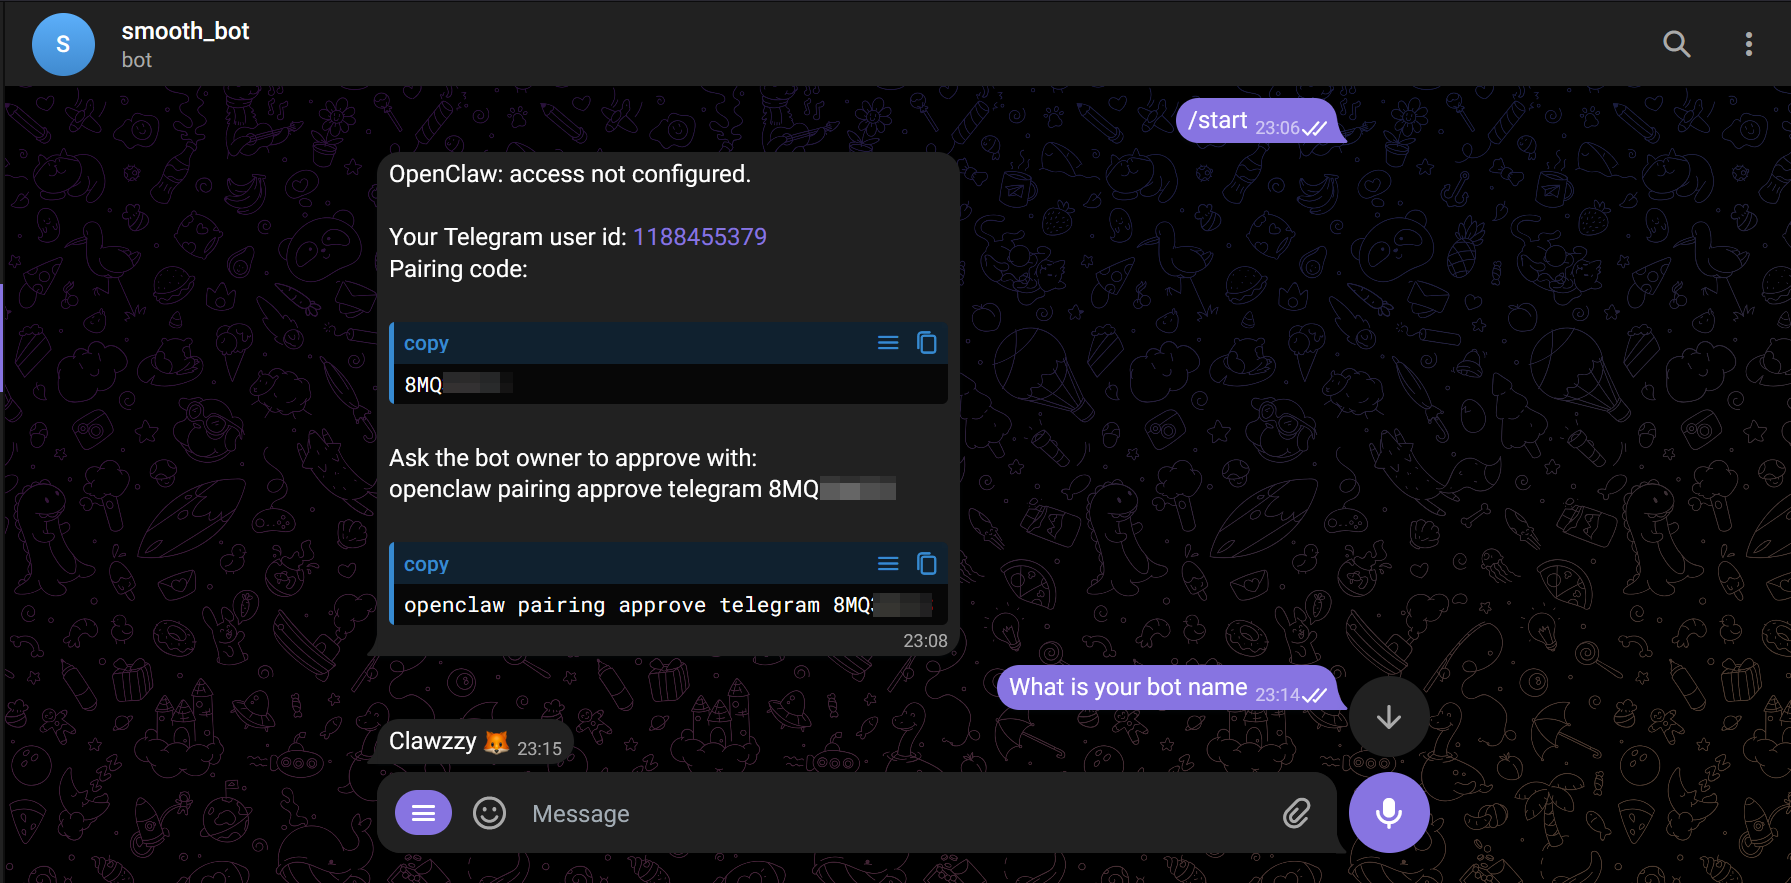
At this point, your bot should be communicating with your OpenClaw agent. I like to check whether my OpenClaw is in sync by navigating to the Chat section of the dashboard. If you see the same conversation there, it shows that everything is working as expected.
Step 5: Install your first skill
What are OpenClaw skills?
OpenClaw skills are Markdown files that enable your AI agent to run shell commands, use tools, and control applications. In simple terms, skills make your agents operational, not just conversational. Each skill is defined by a SKILL.md file located in your OpenClaw workspace folder. Skills are installed from ClawHub or the community skills directory.
Installing skills from ClawHub
This is straightforward. All you need to do is:
Visit the ClawHub official site.
Search and choose a skill.
Copy the CLI command for the skill e.g.,
openclaw skills install trello.Open the terminal, paste the command and run it.
Configure the Brave Search skill
Web search is one of the most common tasks you configure your OpenClaw agents to perform. To enable this, you need the Brave Search skill, which allows your agent to access live web data via Brave’s LLM Context API. This skill is configured via the CLI rather than ClawHub.
To install the Brave Search skill:
Go to the Brave Search API website and obtain a Search API key.
On your terminal, run:
javascriptSelect "Local (this machine)" when prompted for where your gateway will run.
Choose "Yes" when prompted if you want to enable web_search.
Select "Brave Search" as your web search provider.
Paste your Brave Search API key.
Choose "Yes" when prompted if you want to enable web_fetch.
Restart the gateway by running:
javascript
After the gateway restarts, you can ask your Telegram bot search-related questions like "what are the latest news headlines today?". Your bot will browse the internet, process the search results, and give you the latest headlines with a direct source link to read more.
Manage installed skills in the Control UI
To manage your skills, navigate to the Skills section on your dashboard. You'll see a list of your installed skills and their status. If a skill is active, its toggle will be switched on; if it's inactive, the toggle will be off. If a skill is listed under "Needs Setup", it means the skill is installed but cannot be used because it has unmet requirements like missing API keys.
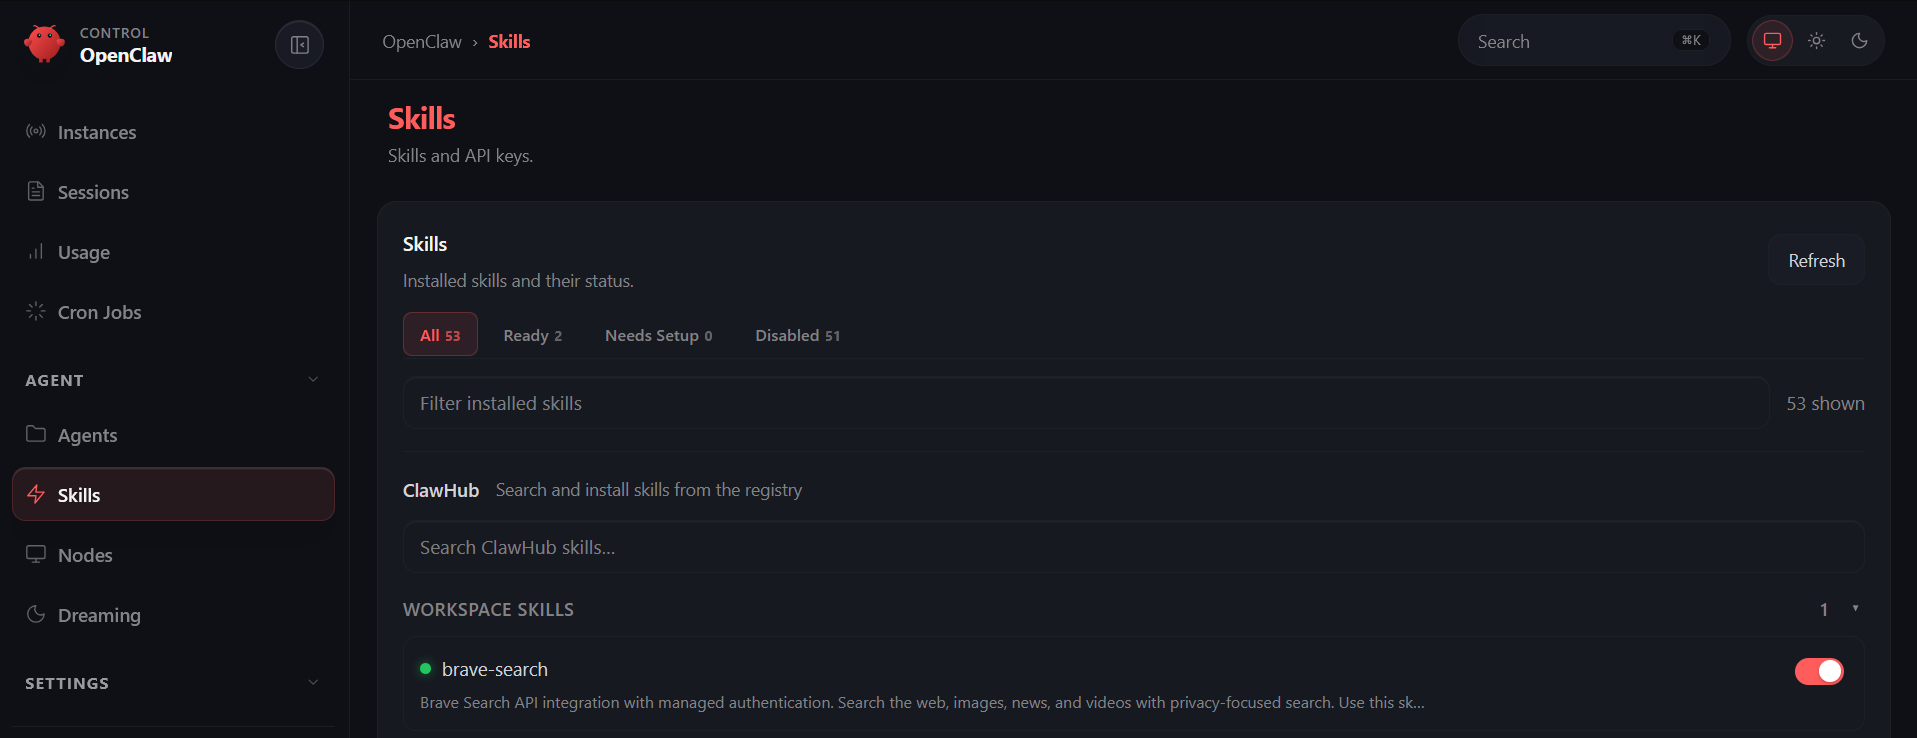
Security note: Skills run with the same permissions as OpenClaw, which means shell access. Treat any third-party skill the same way you’d treat a stranger’s script. Review the SKILL.md file, look for unexpected network calls or credential handling, and ensure it describes exactly what the skill can do. Only install skills from sources you trust.
For a full breakdown of how to keep your agent and machine secure, our OpenClaw Security Best Practices guide is worth reading once you're done here.
Dedicated device setup track
Running OpenClaw on a dedicated device allows it to operate independently of your primary machine. This setup keeps the agent always on while providing better isolation and privacy in your daily work environment. The trade-off is the upfront hardware cost and initial setup required.
Popular hardware choices
Choosing the right device depends on your performance needs and budget. The options below are commonly used:
Mac mini (M2/M4): The most popular choice in the OpenClaw community. It’s silent, energy-efficient, and powerful enough to run multiple agent instances simultaneously. It can also handle local LLMs if needed. Typically costs less than $1000 and is a good option if you want strong performance and long-term reliability.
Raspberry Pi 4 or 5: A budget-friendly alternative that runs OpenClaw comfortably when connected to cloud model providers. Though slower than the Mac mini and not suitable for local LLMs, it works well for a lightweight, always-on agent. Typically costs less than $100 and is a good option if you want a low-cost setup or already have one available.
For the rest of this section, the Mac mini is used as the worked example since it's the most widely documented setup in the community, but the principles apply to any dedicated device.
Configure macOS for always-on operation
Go to System Settings > Energy and enable:
Prevent automatic sleeping when the display is off.
Wake for network access.
Start up automatically after a power failure.
Alternatively, you can use Amphetamine, a lightweight utility designed specifically to prevent your system from sleeping.
Once installed from the Mac App Store, configure the following:
Enable "Start session at launch". This ensures Amphetamine automatically activates whenever your Mac boots, with no manual intervention required.
Set session duration to "Indefinitely". This keeps your Mac awake at all times, rather than for a limited time window.
With these two settings enabled, your macOS machine effectively becomes "always-on", making it suitable for OpenClaw's background services.
Use a dedicated Apple ID and email account
OpenClaw AI agents have shell access to your machine. Using a separate Apple ID and a dedicated email account keeps your personal credentials out of the blast radius if something goes wrong. Make sure to create both accounts before initial setup and use them strictly for OpenClaw operations. Never use them for personal emails or purchases.
VPS and Cloud Deployment Track
Why choose a VPS?
A VPS gives you an isolated cloud environment that runs 24/7, with no hardware investment required. It’s the fastest path to an always-on agent and is ideal for users who want remote access from multiple devices, or who are evaluating OpenClaw before committing to hardware.
The trade-off is a monthly cost (typically around $5-$15/month for a basic instance) and the fact that your data and agent activity pass through a third-party server, which may be a concern if you are privacy-conscious.
Choose a provider
Many VPS providers work well for OpenClaw. Popular choices include DigitalOcean, Railway, Hetzner, Hostinger, and Vultr. The specific setup steps vary by provider, but the underlying process is the same: you provision a Linux instance, SSH into it, and follow the standard OpenClaw installation steps from Step 1 of this guide.
When choosing a provider, consider the following requirements:
At least 1GB RAM (2GB recommended for comfortable operation).
Ubuntu 22.04 LTS or Debian 12 as the base OS (recommended for OpenClaw).
A region close to you for lower latency.
Secure a VPS before installing OpenClaw
A VPS is publicly accessible by default, so a proper security setup is required before you install an agent with shell access. Follow these steps to secure your VPS:
Create a non-root user with sudo access. Never run OpenClaw as root.
Set up SSH key authentication and disable password login.
Apply firewall rules with
ufw. Allow SSH and your HTTPS reverse proxy port, block everything else, including the OpenClaw gateway port (18789).
For remote access, configure an HTTPS reverse proxy in front of port 18789. The official OpenClaw docs walk you through setting up trusted proxy authentication with Caddy, nginx, and other options. Once you’ve provisioned your VPS and tightened security setup, continue with Step 1 of this guide.
Troubleshooting common issues
You may occasionally run into issues while using OpenClaw. Most problems are related to configuration, connectivity, or missing dependencies. Let's look at a few of the issues based on community reports:
Issue | Likely cause | Fix |
| npm global bin not in PATH | Add |
Sharp build error on install | Global | Prefix with |
Gateway not running after reboot | Daemon not installed | Run |
Agent not responding on Telegram | Bot token wrong or gateway is down | Check |
Beyond the above issues, always run openclaw doctor to see underlying configuration issues. If your agent is still responsive, you can ask it directly to diagnose or fix the issues. I’ve used this approach myself to resolve problems quickly.
Wrapping up
You now have a fully functional AI assistant running in the background, connected to your model provider, and accessible directly from Telegram. But this is just the starting point. From here, you can add skills, set up cron jobs, define the agent’s memory and identity, and build more complex OpenClaw workflows. And, most importantly, make sure you follow the OpenClaw security best practices to ensure a setup
If you're serious about taking this further, start with the OpenClaw roadmap. It's a structured path that shows you how to progress from installation to building meaningful AI workflows, so you're not guessing what to learn next or in what order.
